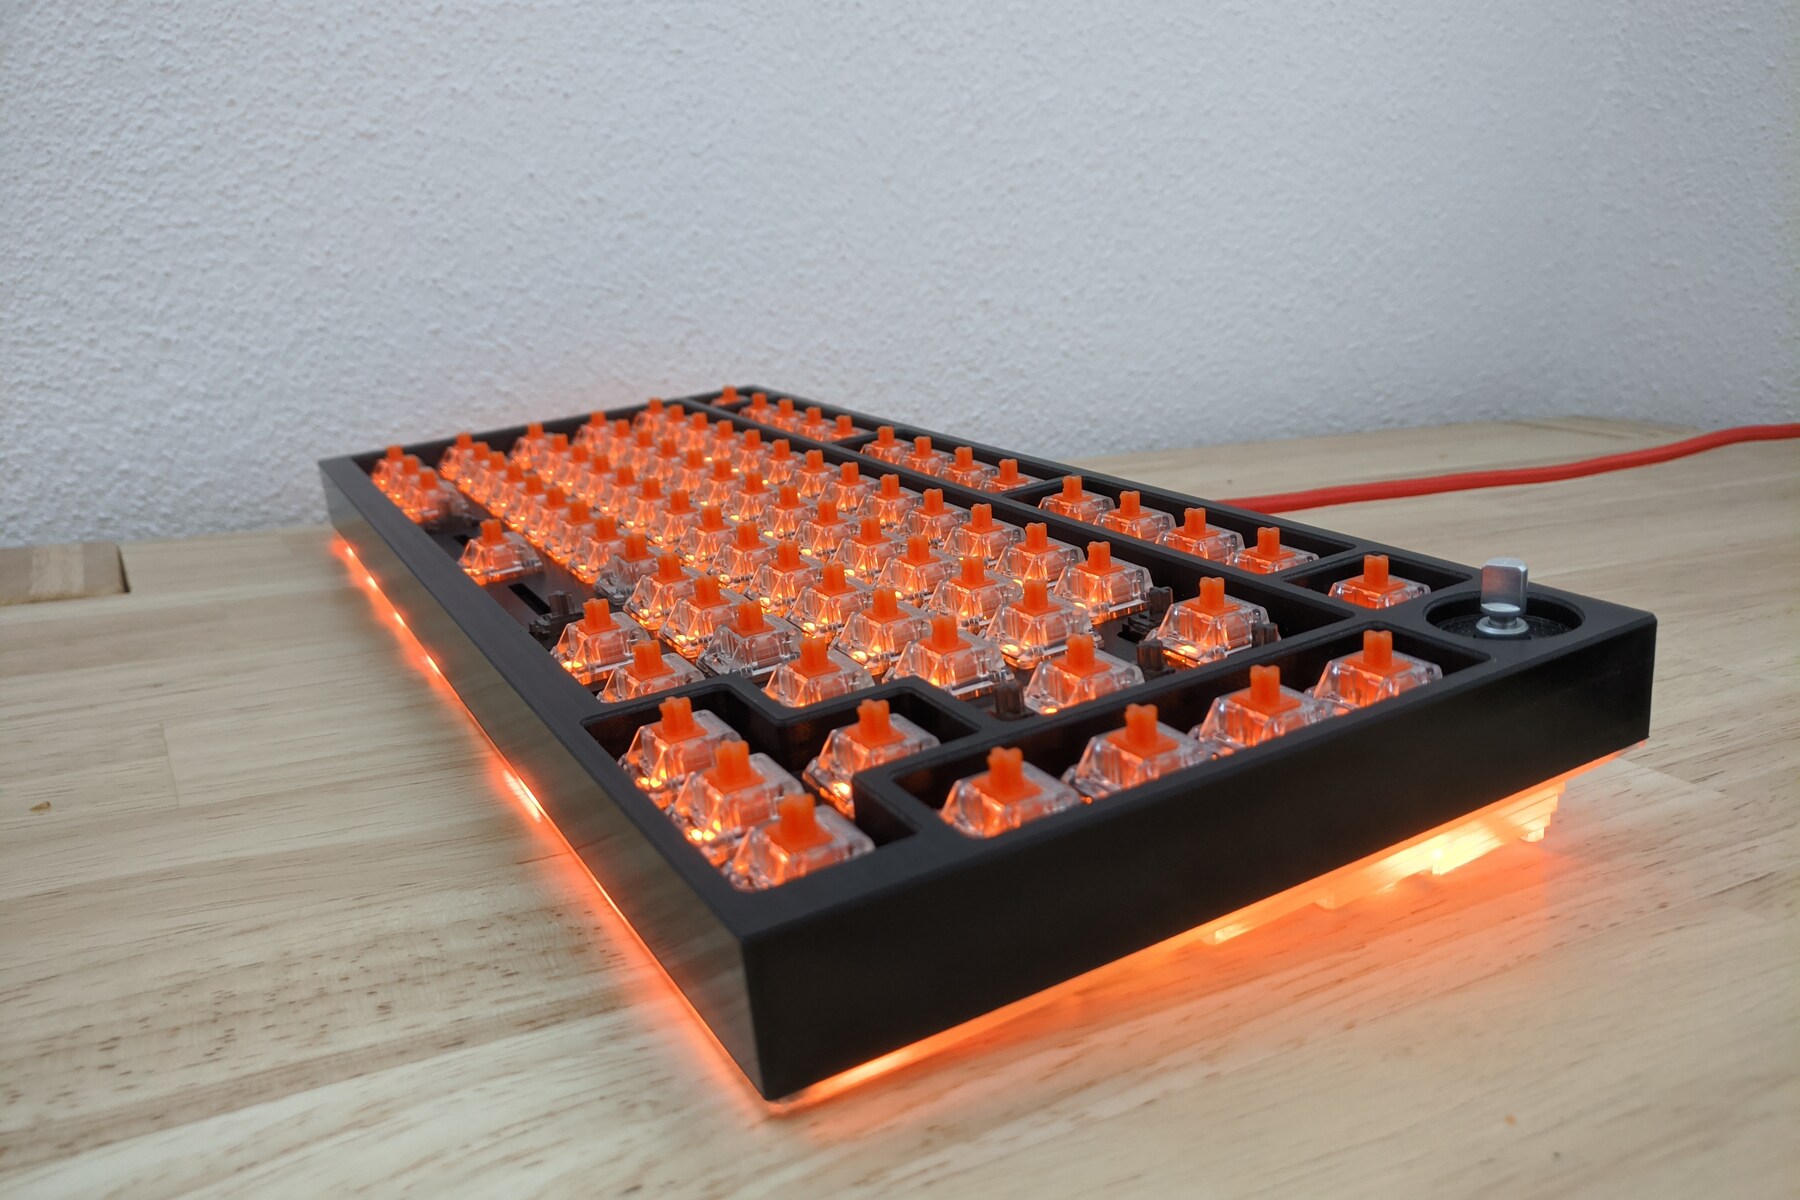
The first prototype is sitting on my desk and works perfectly - clearance for weights and battery is currently wrong, so the intended battery will not fit in the case.
The name isometria75 has it's origin in the greek noun ἰσομετρία (in latin letters: isometria), meaning "equality of measure" [1]. This word ended up being included in various languages, among them english (isometric), with the same meaning. I chose it for two reasons - because this keyboard is only available in an ISO layout (sorry ANSI users - for once it is ne ANSI avail), but also, because I paid attention to only use u/4 spaces throughout my board. You will have a hard time finding any distance on it that's not a multiple of 4.75 mm.
 |
 |
|---|---|
 |
|
- CNC'd top shell with integrated 3 mm plate (obviously, with cutouts for switch retention and PCB mount stabs)
- 6.8° typing angle
- The PCB is equipped to fit 82 cherry MX-style switches
- One 3 mm LED per switch (monochrome, dimmable only as one group)
- 17 SK6812 Mini can be soldered to the bottom of the board for underglow
- Fits either a battery-management or a simple USB-C daughterboard (Repo link)
- A rotary encoder sits in the top right corner and the push-button is wired to the controller (Row 0 Column 15)
- The USB-C connector is placed on a small PCB on it's own, which can be replaced by a battery management board
- Sense wires to measure the input voltage and to check if the battery is currently being charged
- A STM32F072CBT6 controller with native crystal-less USB and a lot of IO for various things
- An SPI interface is wired to a second connector, allowing for a SPI Bluetooth LE board to be added
- One leftover GPIO is available on a header - if you want to add something yourself
The PCB uses a key spacing of 19 mm (instead of the default 19.05), and all delimiters between key-blocks, or keys and the border of the case are 4.75 or 9.5 mm wide. This allows for a pleasantly homogenous design, which earned the keyboard it's name. Sadly, this layout requires a 1.5u right shift, which very few sets include.
The bottom shell breaks the minimalist design of the top shell a little, with "stepped" faces. While the design originated from the need to make it easily millable on a 3 axis CNC, I appreciate the fact that it makes the board visually a bit more interesting.
https://geekhack.org/index.php?topic=106060.msg2896354
-
Where can I buy this?
I'm afraid there will not be any groupbuy nor will it be stocked at some reseller - All files are open source though, feel free to order a batch of PCBs and a case yourself - or improve it!
-
When will there be an ANSI version?
Even though I planned not to do ANSI, I actually went with multi-layout for v2! Stay tuned!
-
Why did you clone the Evolv/Satisfaction?
I made my own design choices, and designed everything from scratch - however the evolv heavily influenced my design. I fell in love with it the first time I saw it, but it had a few things I dislike. So I decided to mostly adopt it's layout with some changes, and design a case which follows my design ideals - ending up with a (visually) very similar top enclosure - The standalone-features of the evolv are it's premium materials, construction and generative design, and I did not include either.
For any other questions, or problems with my board (if you decided to build one yourself) - feel free to contact me. I'm idling around and occasionally check my PMs on freenode (ebastler), am active on reddit (the_ebastler) and on discord (ebastler#8966).
- ai03 for both his great tutorial as well as his various footprints I used in my design - I don't know if I had been able to design this without his help.
- The awesome people on grabcad for the MX switch, Cherry Stab and pushbutton models, JST SH models and WS2812 Mini models which made my design a whole lot easier, and my renders prettier.
- People on the MechKeys and Mechanische Tastaturen Deutschland discord servers who tirelessly answered my questions - from the noobiest to the most complicated ones.
- Propagandalf1 for all the advise, criticism and ideas for improvement
- Pseudoephedrin and Lux for checking my PCB layouts for errors
- Hendrik for milling my proto