6. Examples
Below, you can find all the functions that can be performed with the Hunter Cat NFC using the codes that we have developed, which can be found in the project repository or by clicking here.
The following examples use the program "HunterCatNFC_AllOne.ino" To load it to the board it is necessary to open it with Arduino IDE, once it is opened you will get a window like the following image:

This example needs to install libraries “SDFat - Adafruit Fork” and, “Adafruit SPIFlash” to run the program. Install them following the next pictures:


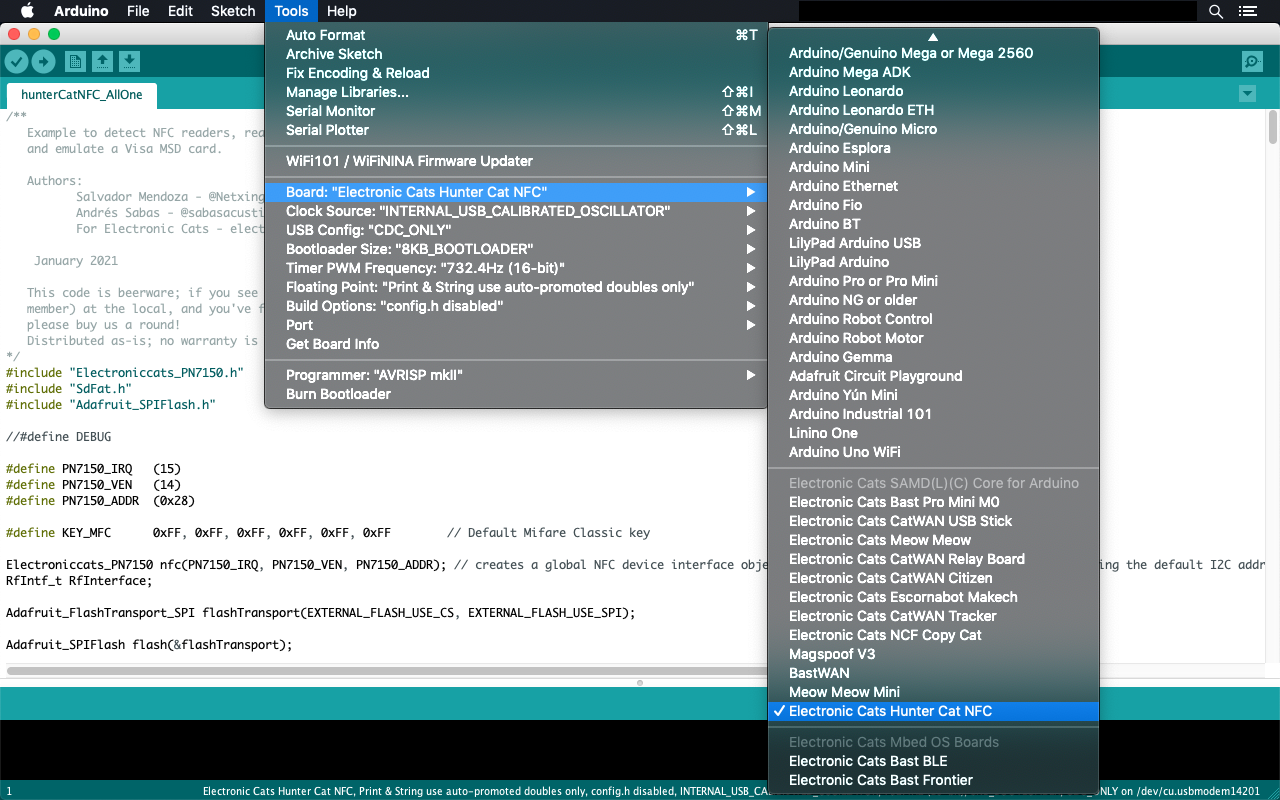
To load the program you have to select the correct board, in this case, "Electronic Cats Hunter Cat NFC" as shown in the following image:
Now we proceed to enter Bootloader mode on the Hunter Cat NFC by pressing the “Reset” button twice quickly.
To load the program into the board, press the "Upload" button, and the following will appear on the screen.

Once the program is uploaded to the board, the right led will turn red indicating that the board is ready to be used. Using the buttons, the user can access 3 available modes:
- Button 2 (upper left) - NFC card emulation.
- Button 1 (upper right) - Emulates a VISA MSD (Magnetic Stripe Data).
- Button 0 (Lower Right) - Works as a MIFARE card reader.
In this mode, Hunter Cat NFC emulates an NFC tag. It doesn’t initiate communication, it only responds to an NFC reader. A typical application of the card emulation mode is how people use NFC in their smartphones to replace several cards, badges, or tags at once (using the same phone for RFID access controls, contactless payments, and so on). Card emulation mode, however, is not useful just for smartphones, but for any type of portable device. Pressing the button 0 will turn on the pink / greenish-blue led, which indicates that Hunter Cat NFC will emulate an NFC card ready to be read by an NFC reader.

If the Hunter Cat NFC is connected to the PC. Opening the “Serial Monitor” and pressing button 0 will display the following message.
Opening the “Serial Monitor” is necessary to press the following button.

This indicates that Hunter Cat NFC is looking for NFC readers.

When you bring the Hunter Cat NFC closer to the NFC reader, it will read the card and the Hunter LED will turn off, indicating that the information has been read correctly.

While on the serial monitor, it will indicate that a card reader has been found.

If you want to use this function again, you just have to press the button 0 again. If there is a problem with the reading, press the Reset button and start again.
In this mode, the Hunter Cat NFC will emulate to be a Visa card that can be read through an NFC reader. This function is activated by pressing Button 1, and the right LED of the Hunter Cat NFC will turn green, indicating that it is ready to be read by the NFC reader.

When opening the "Serial Monitor" the following message will be displayed.

Once the Hunter Cat NFC is read, the Visa card emulation will show the following data from the example in the "Serial Monitor".

Once the Hunter Cat NFC has been read, the right LED will turn off. If a new operation is required, simply press Button 1 again.
In the event of an error, press the Reset Button and wait for the Hunter Cat NFC to reboot.
MIFARE cards are plastic cards used in access control systems, identity verification, and transportation systems among many other applications. Each card has a unique serial number (MIFARE USN) of 4 or 7 bytes depending on the version. There are 2 versions: 1K and 4K.
In this mode, the Hunter Cat NFC will function as a MIFARE card reader. It will be activated by pressing button 2, in which the Hunter Cat NFC will light the right blue LED.

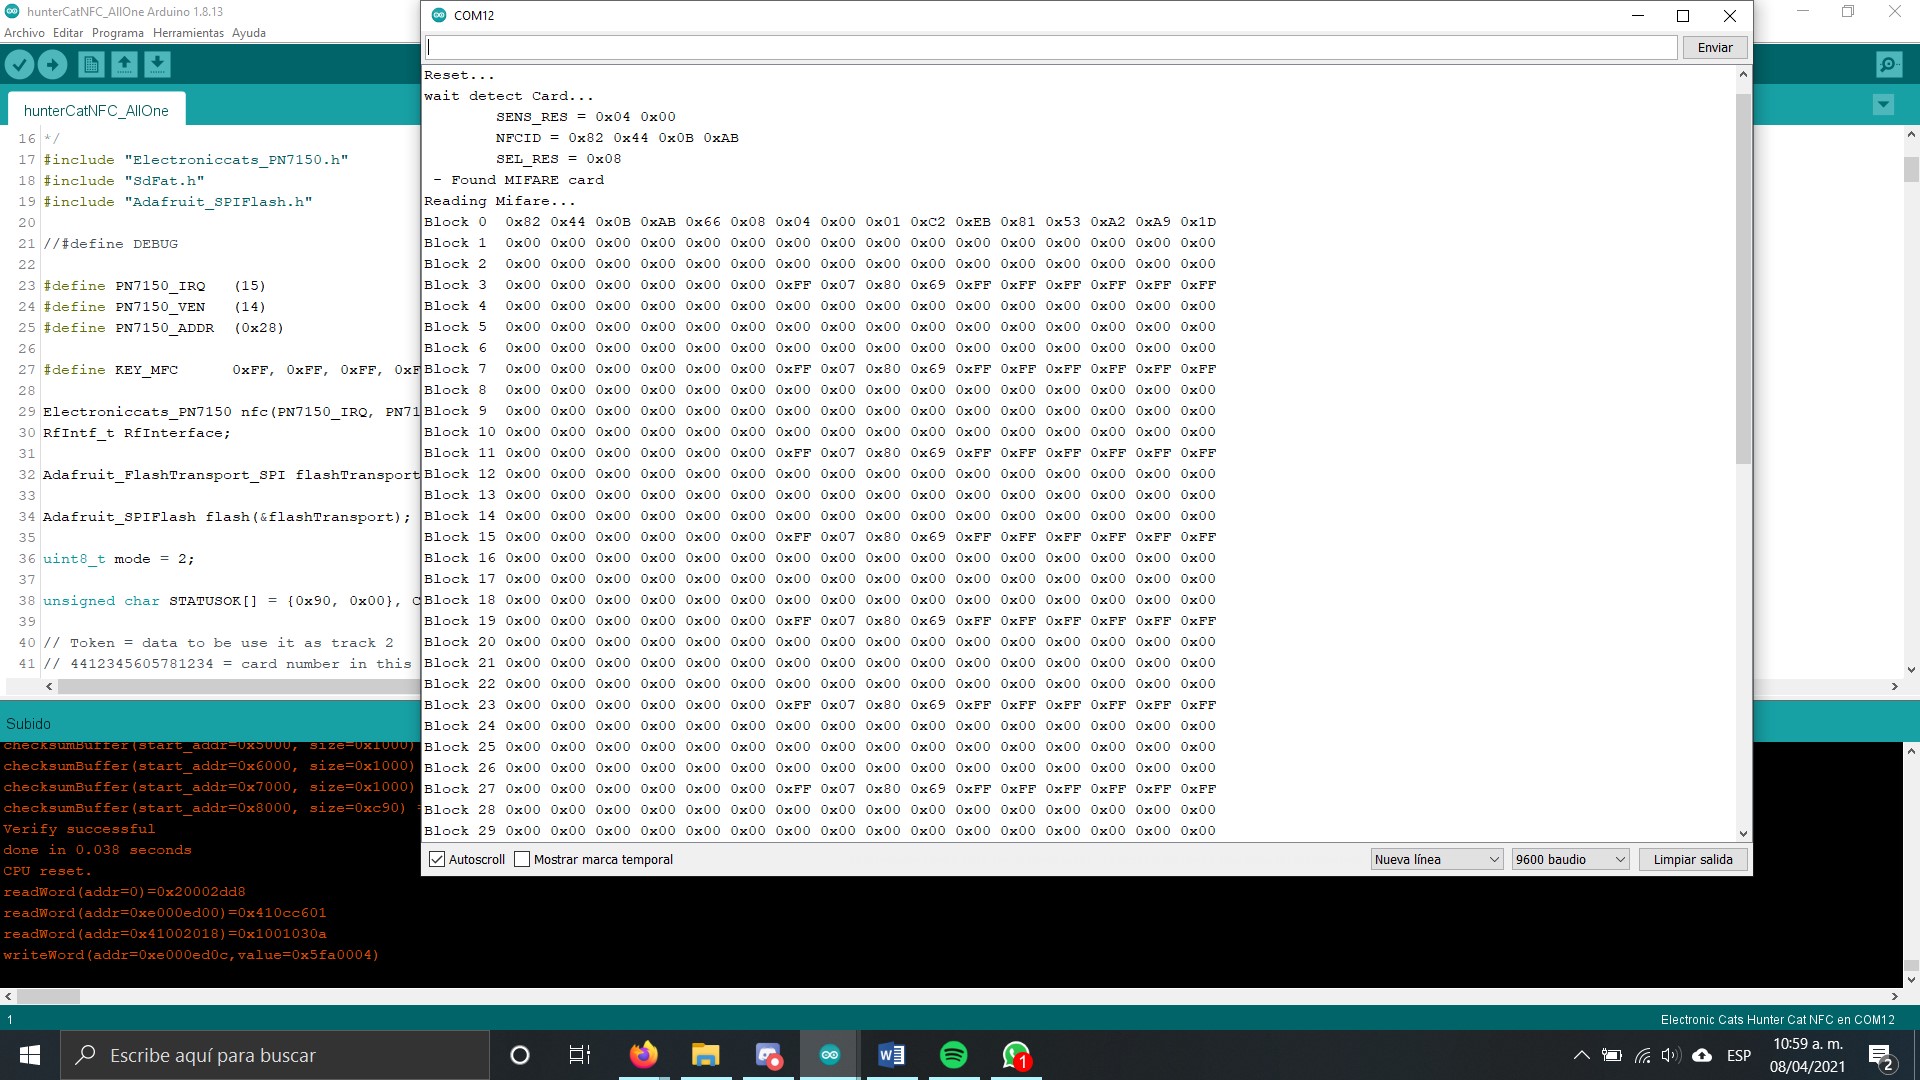
When opening the "Serial Monitor", the following message will be displayed indicating that the Hunter Cat NFC is ready to read a MIFARE card.

Bringing a card closer to the Hunter Cat NFC will initiate data transfer. For the case of this example in the "Serial Monitor", the following data will be seen.


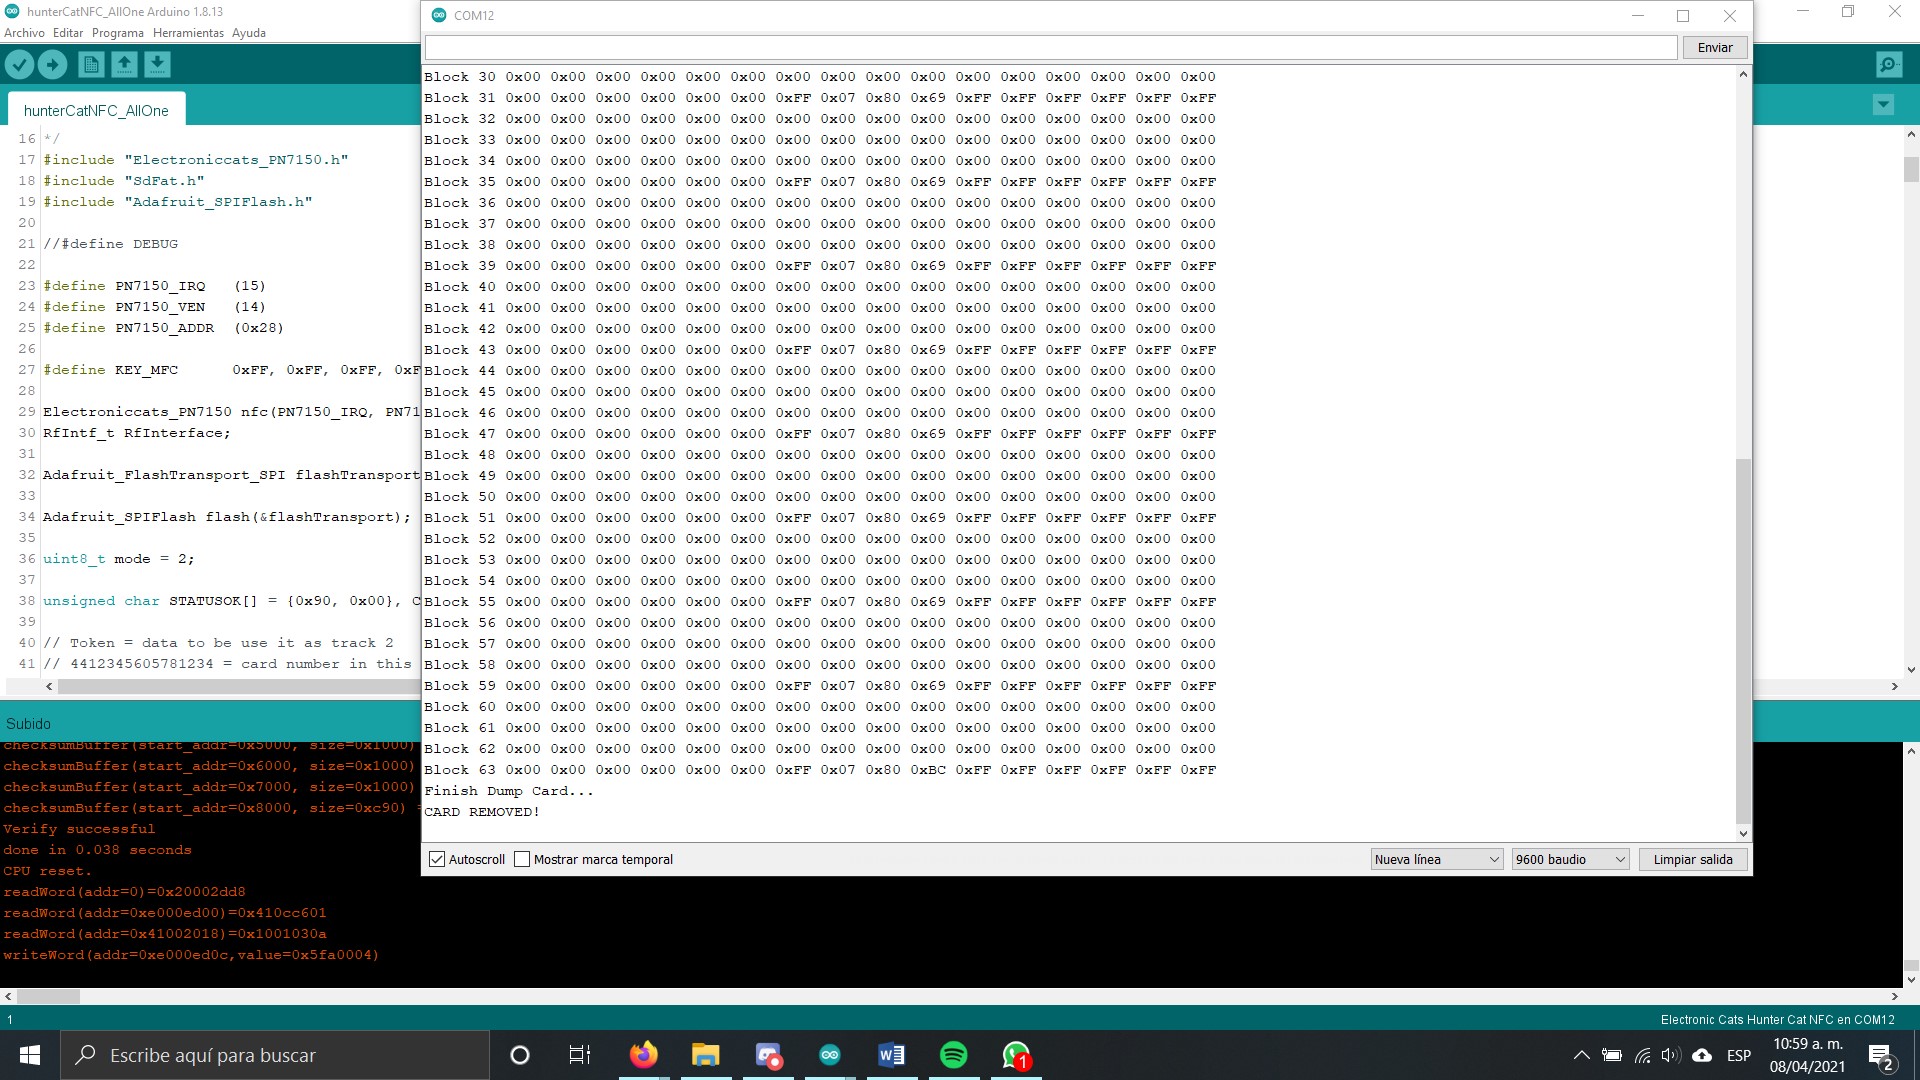
When the process has finished, when removing the card from the reader it will be possible to observe in the "Serial Monitor" that said the card was removed.
If you want to read the card again, just press button 2 again and replace the card. Similarly, if there is an error in the reading, press the Reset button to reset the Hunter Cat NFC.
For this example, 2 Hunter Cat NFC will be required to establish communication.
The left one will be known as HCNFC1 and the right one will be HCNFC2.
In the Firmware folder, select “HunterCatNFC_P2P” and open the Arduino program.
Connect the HCNFC1 to the PC, and select the port where the PC recognizes the board. Tools > Port > Select Port

Now the program is ready to be uploaded to the board. Select the button “Upload” and wait until the process finishes.

The next step is to open the “Serial Monitor” to initialize the script. Press Tools > Serial Monitor

It will appear as the Serial Monitor as shown in the next image.

That indicates it is ready to start the process of connection for P2P, but it is missing the other HCNFC2. You MUST do the same process again but for the HCNFC2.
Open “HunterCatNFC_P2P”, and select the correct port. In this case, HCNFC2 uses COM12 while HCNFC1 uses COM18.

Once the port is selected, upload the program to the board and wait until it finishes. When the uploading is completed proceed to open the “Serial Monitor”.
We recommend having both Serial Monitors to see how it will work the P2P connection (shown in the next image):

To start, approach the antenna of the HCNFC1 to the antenna of the HCNFC2 and they will begin to establish communication.

Mode: Talking to NFC Hunter Cat

Mode: Listening to NFC Hunter Cat
Hunter Cat NFC will turn the right LED in red color when it is listening and the LED will turn blue when it is talking. So in the image above HCNFC2, it’s talking to HCNFC2 that it's listing. In the Serial Monitor will appear what we are talking about.

COM18 represents HCNFC1 and it is shown how it is communicating with HCNFC2 which uses COM12, the “Peer lost!” is an interruption in the program but it also appears when both Hunter Cat NFC split. This can be shown in the next image.
The Serial Monitor stops and it ends with “Peer lost!”.

If you want to continue with the communication, approach again the Hunter Cat NFCs.

Thank you for reading our Wiki!
