- Features
- Getting LabPowerQt
- Compiling from source
- Using the Application
- Screenshots
- Development
- ToDo
- Bugs, feature requests, ideas
- Known issues
- License
LabPowerQt is an application to control laboratory power supplies and to record and visualize the data.
The software is written using the Qt Framework and therefor works on Linux, Windows and macOS. Although it works cross platform the main target platforms for this project are Linux and macOS.
The application is in an early stage of development make sure to read the known issues section.

- Cross platform written in Qt
- Support for polling frequencies higher than 1Hz
- Full support of the Korad SCPI Interface
- Device Wizard for simple device setup
- Visualize Data in a fully customizable plot with image export functionality
- Store data in a SQLite Database
- Manage recorded sessions
- Export data to csv files
Linux users have two different options to run the application. Either install a package provided by your distribution or use the AppImage to run the LabPowerQt without the need to compile the source code or install any dependencies. You can download the AppImage from the github releases tab for this project.
The AppImage was tested on these distributions:
- ArchLinux (2017-04-19)
- Fedora Workstation 25
- Ubuntu trusty (AppImage is build on this distribution)
If you have used the AppImage on other distributions please let me know if it worked for you.
LabPowerQt packages are available on these Linux distributions:
I am providing an InnoSetup based installer for x86 and amd64 containing all dependencies. It is downloadable from github.com
The following dependencies are required to run this software:
- cmake >= 3.1.3 (If you want to compile ealogger as well you need version 3.4 or higher)
- One of these Compilers:
- gcc >= 4.9
- clang >= 3.4
- MSVC >= 14 (Visual Studio 2015)
- MinGW >= 4.9
- Qt >= 5.4 (Qt5Widgets, Qt5Gui, Qt5Core, Qt5SerialPort, Qt5Sql, Qt5PrintSupport, Qt5Quick)
- ealogger >= 0.8.1 (Included as external project)
You can obtain the source code from github.
If you want to compile LabPowerQt yourself you will find these cmake options useful:
- EALOGGER_EXTERNAL - Settings this to on will automatically download and build ealogger. (Default ON)
Compiling LabPowerQt on Linux and macOS using unix make files.
# download the source code and change to the directory
# create a build directory
mkdir build
cd build
# run cmake to create makefiles. Use -DCMAKE_PREFIX_PATH if cmake doesn't find
# your installation of Qt5
cmake -DCMAKE_BUILD_TYPE=Release ../
# now compile the source code and create the application. You can speed up
# compilation with make's j option.
make
# install the application
sudo make installYou can compile LabPowerQt on Windows using cmake's Visual Studio Generator.
# create build directory inside labpowerqt source directory
mkdir build
cd build
# Assuming you are using Visual Studio 2015 on a 64bit windows installation and
# Qt 5.6 installed to C:\\Qt
# Please change these options so they suit your build evironment.
cmake -G"Visual Studio 14 2015 Win64" -DCMAKE_PREFIX_PATH="C:\\Qt\\5.6\\msvc2015_64" ../
You may now open the solution file with visual studio and compile the application.
Other possibilities are cmake's NMake Generator or mingw.
Currently the application only supports Devices using the Korad SCPI Protocol
- Korad KA3003P; KA3005P; KA3010P
- Korad KA6002P; KA6003P; KA6005P
- Vellemann PS3005D (rebranded KA3005P)
- Tenma 72-2535; 72-2540 (rebranded KA30XXP)
- Tenma 72-2545; 72-2550 (rebranded KA60XXP)
The Application is easy to use and most things should be self explanatory. Many controls offer tooltips about what they do.
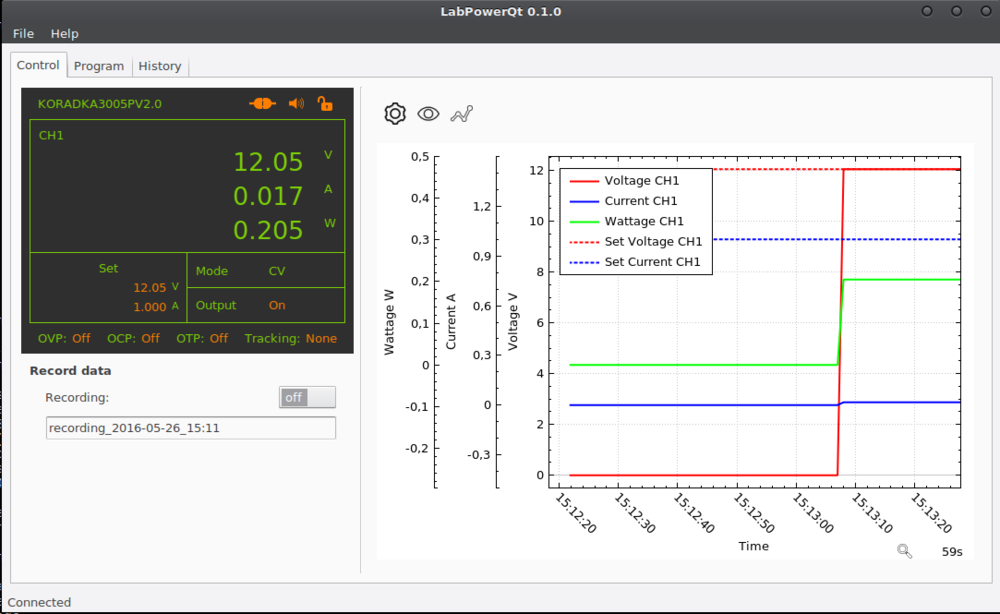
To control the device connected to your computer you have to use the Control Area in the main window. It consists of green and orange elements and serves for two purposes at the same time. The current state of the device is displayed there and you can use the orange elements to control the device (by double-clicking them).
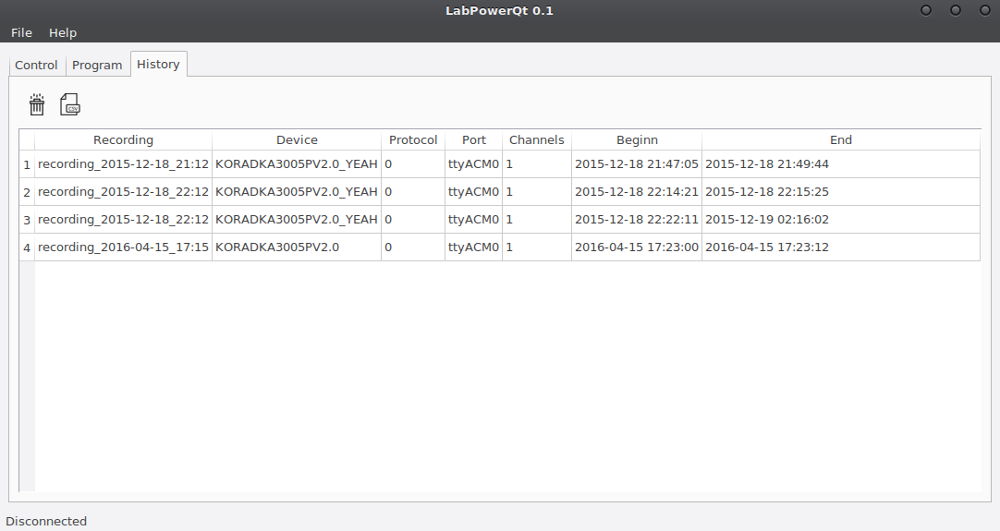
The data of the device is stored in memory. You can also persist the data in a SQLite database by turning on a Recording.
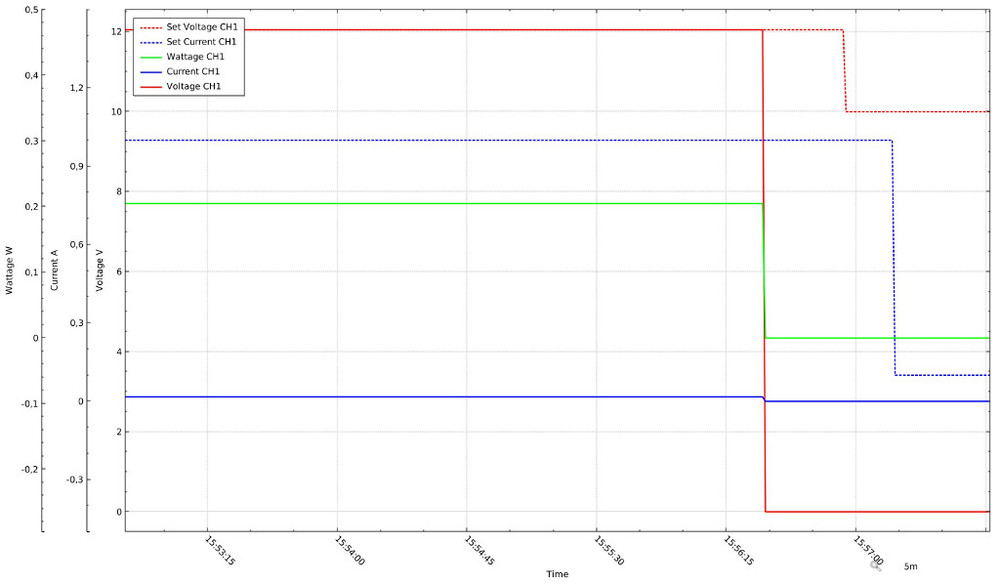
The data is not only displayed in the control area but can also be visualized in a Plot on the right side of the main window. Have a look at the buttons above the Plot to discover all the possibilities you have (e.g. change graph colors or line style, export plot as image, discard data and many more).
The settings dialog is important as you have to use the build in device wizard to add a device. Other things can be set there as well.


Brief overview over the development process.
The github repository of labpowerqt has several different branches.
- master : Main development branch. Everything in here is guaranteed to compile and is tested. This is the place for new features and bugfixes. Pull requests welcome.
- development : Test branch and wild west area. May not compile.
- release-x.x : Branch for a release. Only bugfixes are allowed here. Pull requests welcome.
- gh-pages : Special branch for static HTML content and images hosted by github.io.
The source code is formatted with clang-format using the following configuration
Language                            : Cpp,
BasedOnStyle                        : LLVM,
AccessModifierOffset                : -4,
AllowShortIfStatementsOnASingleLine : false,
AlwaysBreakTemplateDeclarations     : true,
ColumnLimit                         : 81,
IndentCaseLabels                    : false,
Standard                            : Cpp11,
IndentWidth                         : 4,
TabWidth                            : 4,
BreakBeforeBraces                   : Linux,
CommentPragmas                      : '(^ IWYU pragma:)|(^.*\[.*\]\(.*\).*$)|(^.*@brief|@param|@return|@throw.*$)|(/\*\*<.*\*/)'
I decided to use semantic versioning
Travis CI is used as continuous integration service. The labpowerqt github repository is linked to Travis CI. You can see the build history for the master branch and all release branches on the travis project page.
Have a look in the todo folder. I am using the todo.txt format for my todo lists.
Please use the github bugtracker to submit bugs or feature requests
-
The application does store the visibility for each graph (current, wattage ...) and this state is reapplied from the settings file whenever you start labpowerqt. Currently this is not working correctly with QCustomPlot and there is nothing I can do about it as I believe it is because of a bug in their code.
-
Polling frequencies higher than 1Hz seem to work unreliable on macOS and Windows. I have no idea if this is a problem with QSerialPort, the underlying driver implementation or system layer.
Copyright (C) 2015, 2016, 2017 Christian Rapp

This program is free software: you can redistribute it and/or modify
it under the terms of the GNU General Public License as published by
the Free Software Foundation, either version 3 of the License, or
(at your option) any later version.

This program is distributed in the hope that it will be useful,
but WITHOUT ANY WARRANTY; without even the implied warranty of
MERCHANTABILITY or FITNESS FOR A PARTICULAR PURPOSE.  See the
GNU General Public License for more details.

You should have received a copy of the GNU General Public License
along with this program.  If not, see <http://www.gnu.org/licenses/>.


