High lights:
- Dynamic PWM fan speed control for raspberry, based on cpu temperature.
- a python script fan.py, using python module lgpio for PWM.
- Support for Fedora 32/33 and other linux distros the uses a new linux kernel.
- Support for kernels that does not use the lagecy interface /sys/class/gpio anymore.
- Uses Python modules which provide functionality via the /dev/gpiochip interface.
- Easy to setup, running in a container using podman or docker.
- Runs on raspberry 32bit and 64bit, tested on raspberry 2B, 3B+ and 4B (4GB/8GB model)
Since the raspberry pi 4 was released, a fan to cool down the board became more common. I tried lots of fans and they all make some noice. If you have a couple of raspberries, all these fans will produce to much noice. In such a case it is very usefull to dynamicly control the fan speed, so it will cool faster when the cpu gets hotter and (most important) slow down when it is not needed.
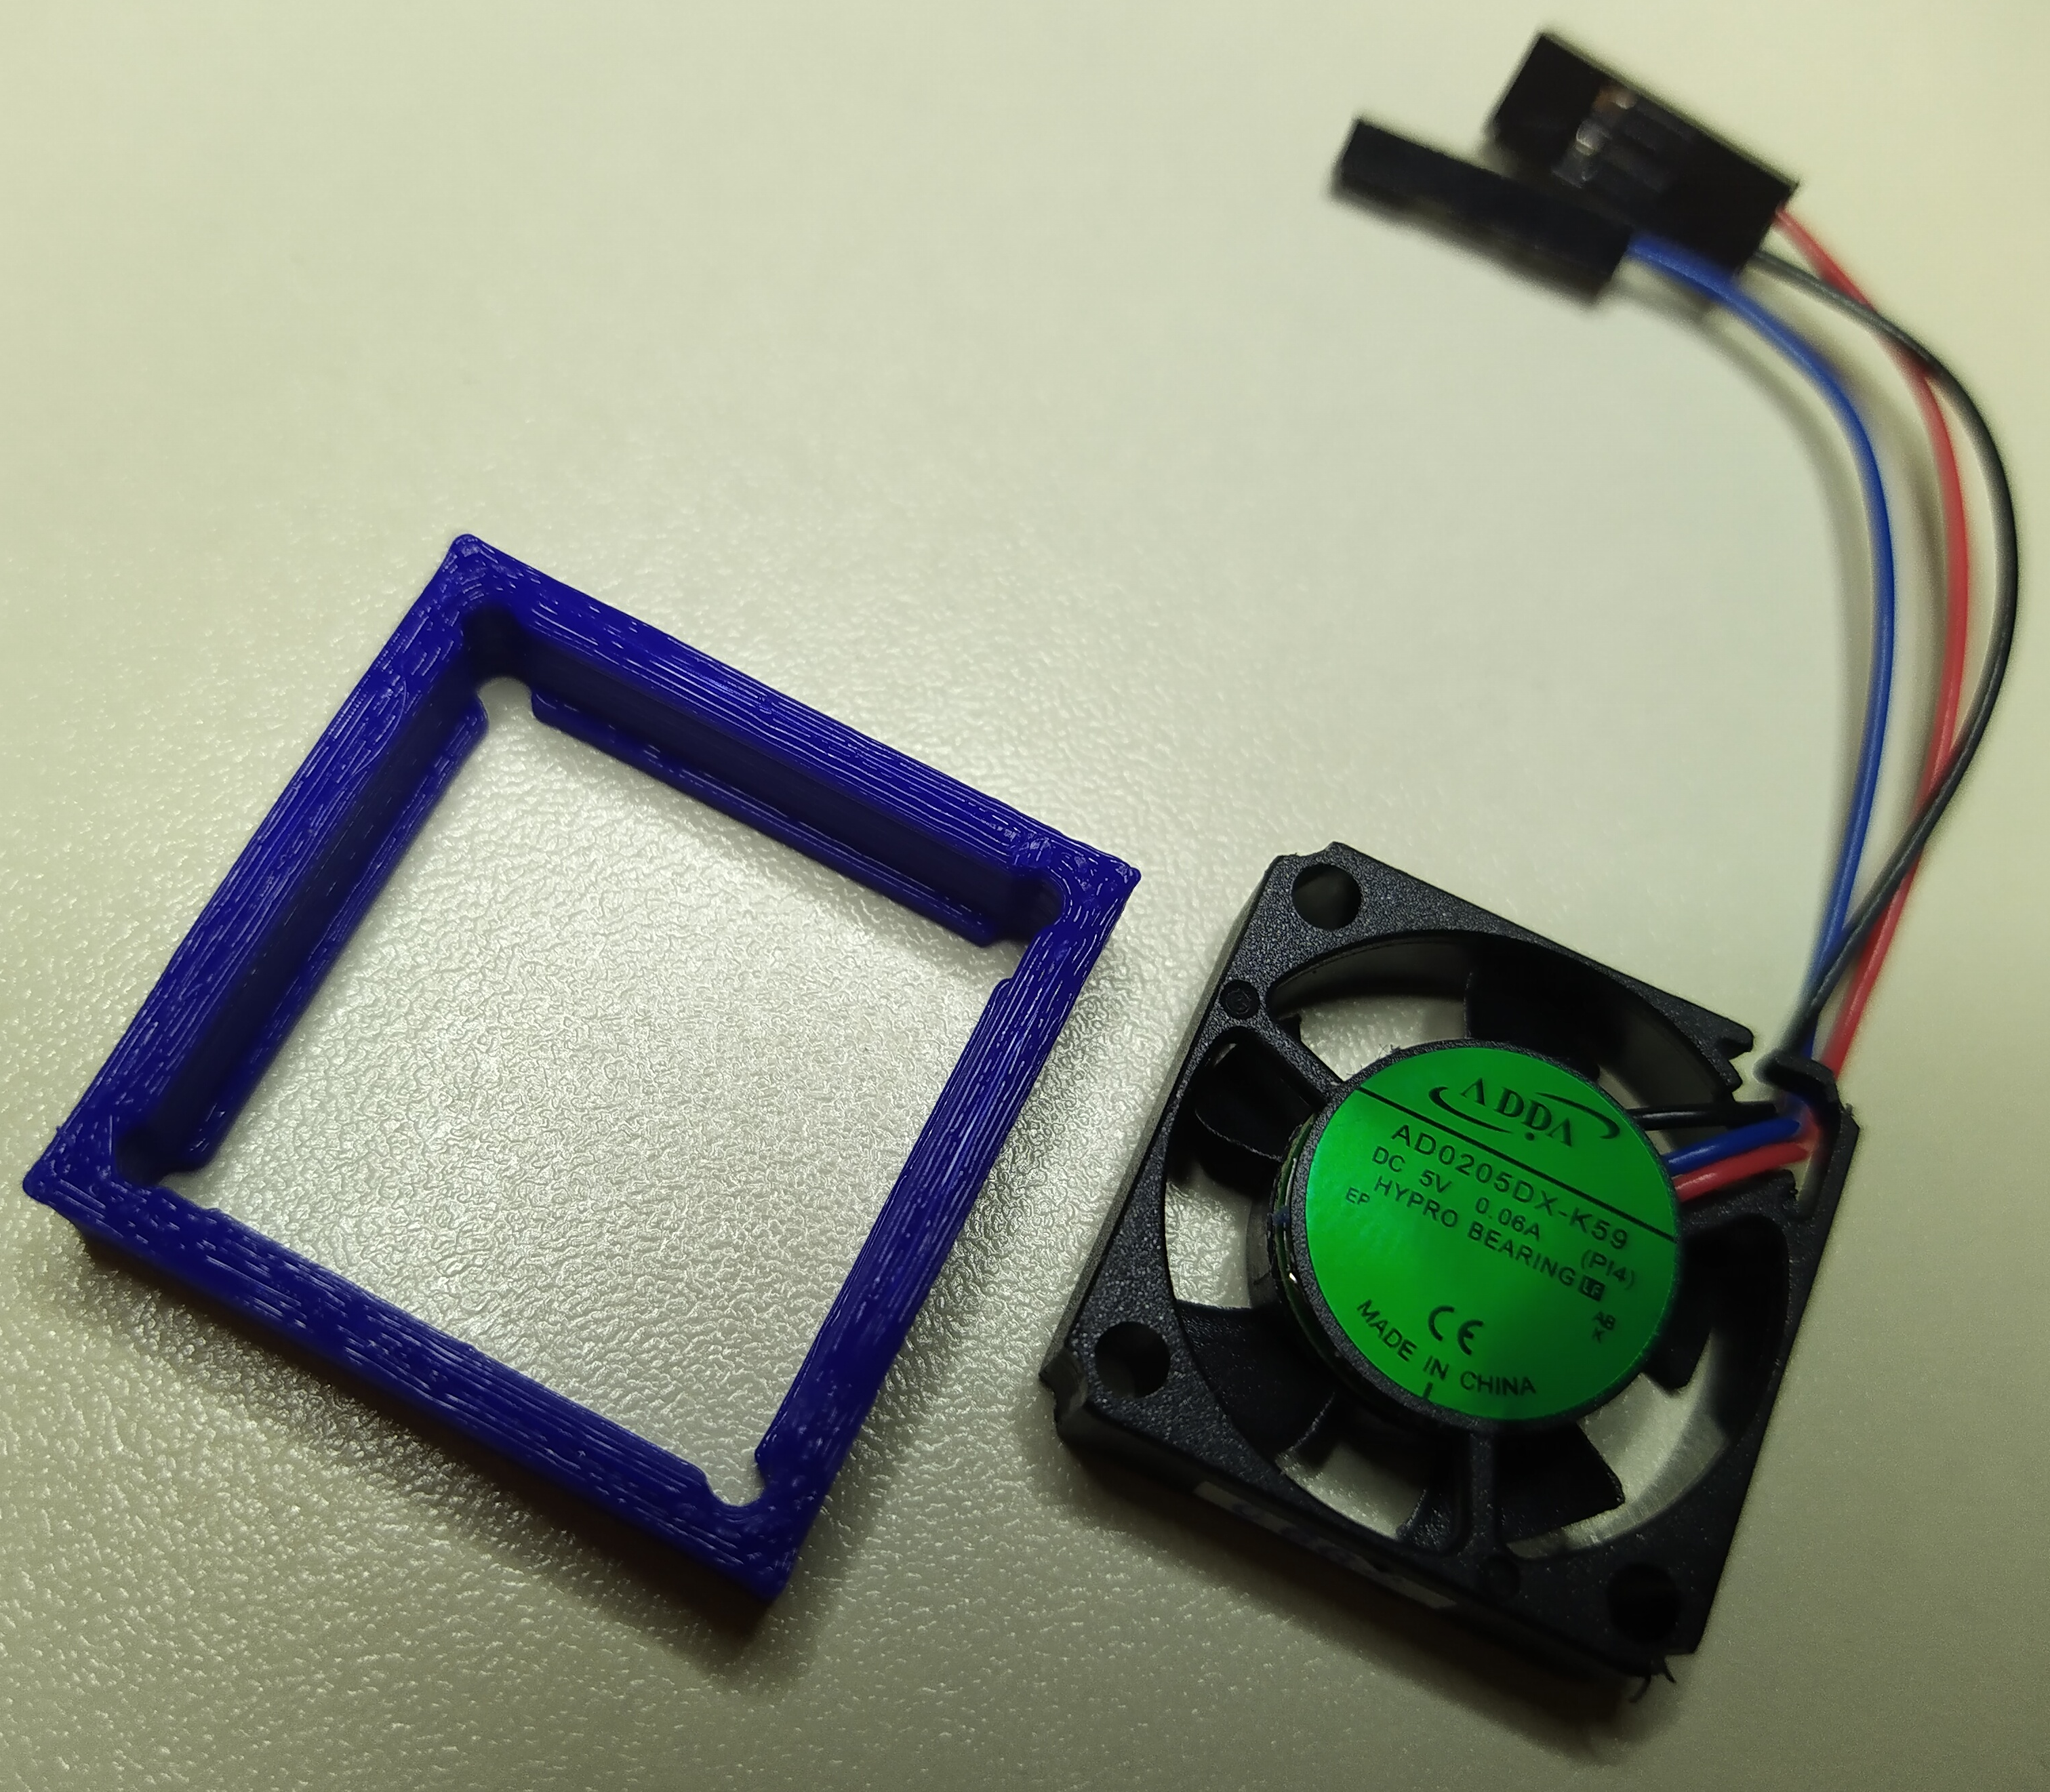
To do so you can use a cooling fan with PWM (Pulse Width Modulation) support. The official raspberry pi fan has PWM support. It has 3 pins:
- red: +5V
- black: GND
- blue: PWM
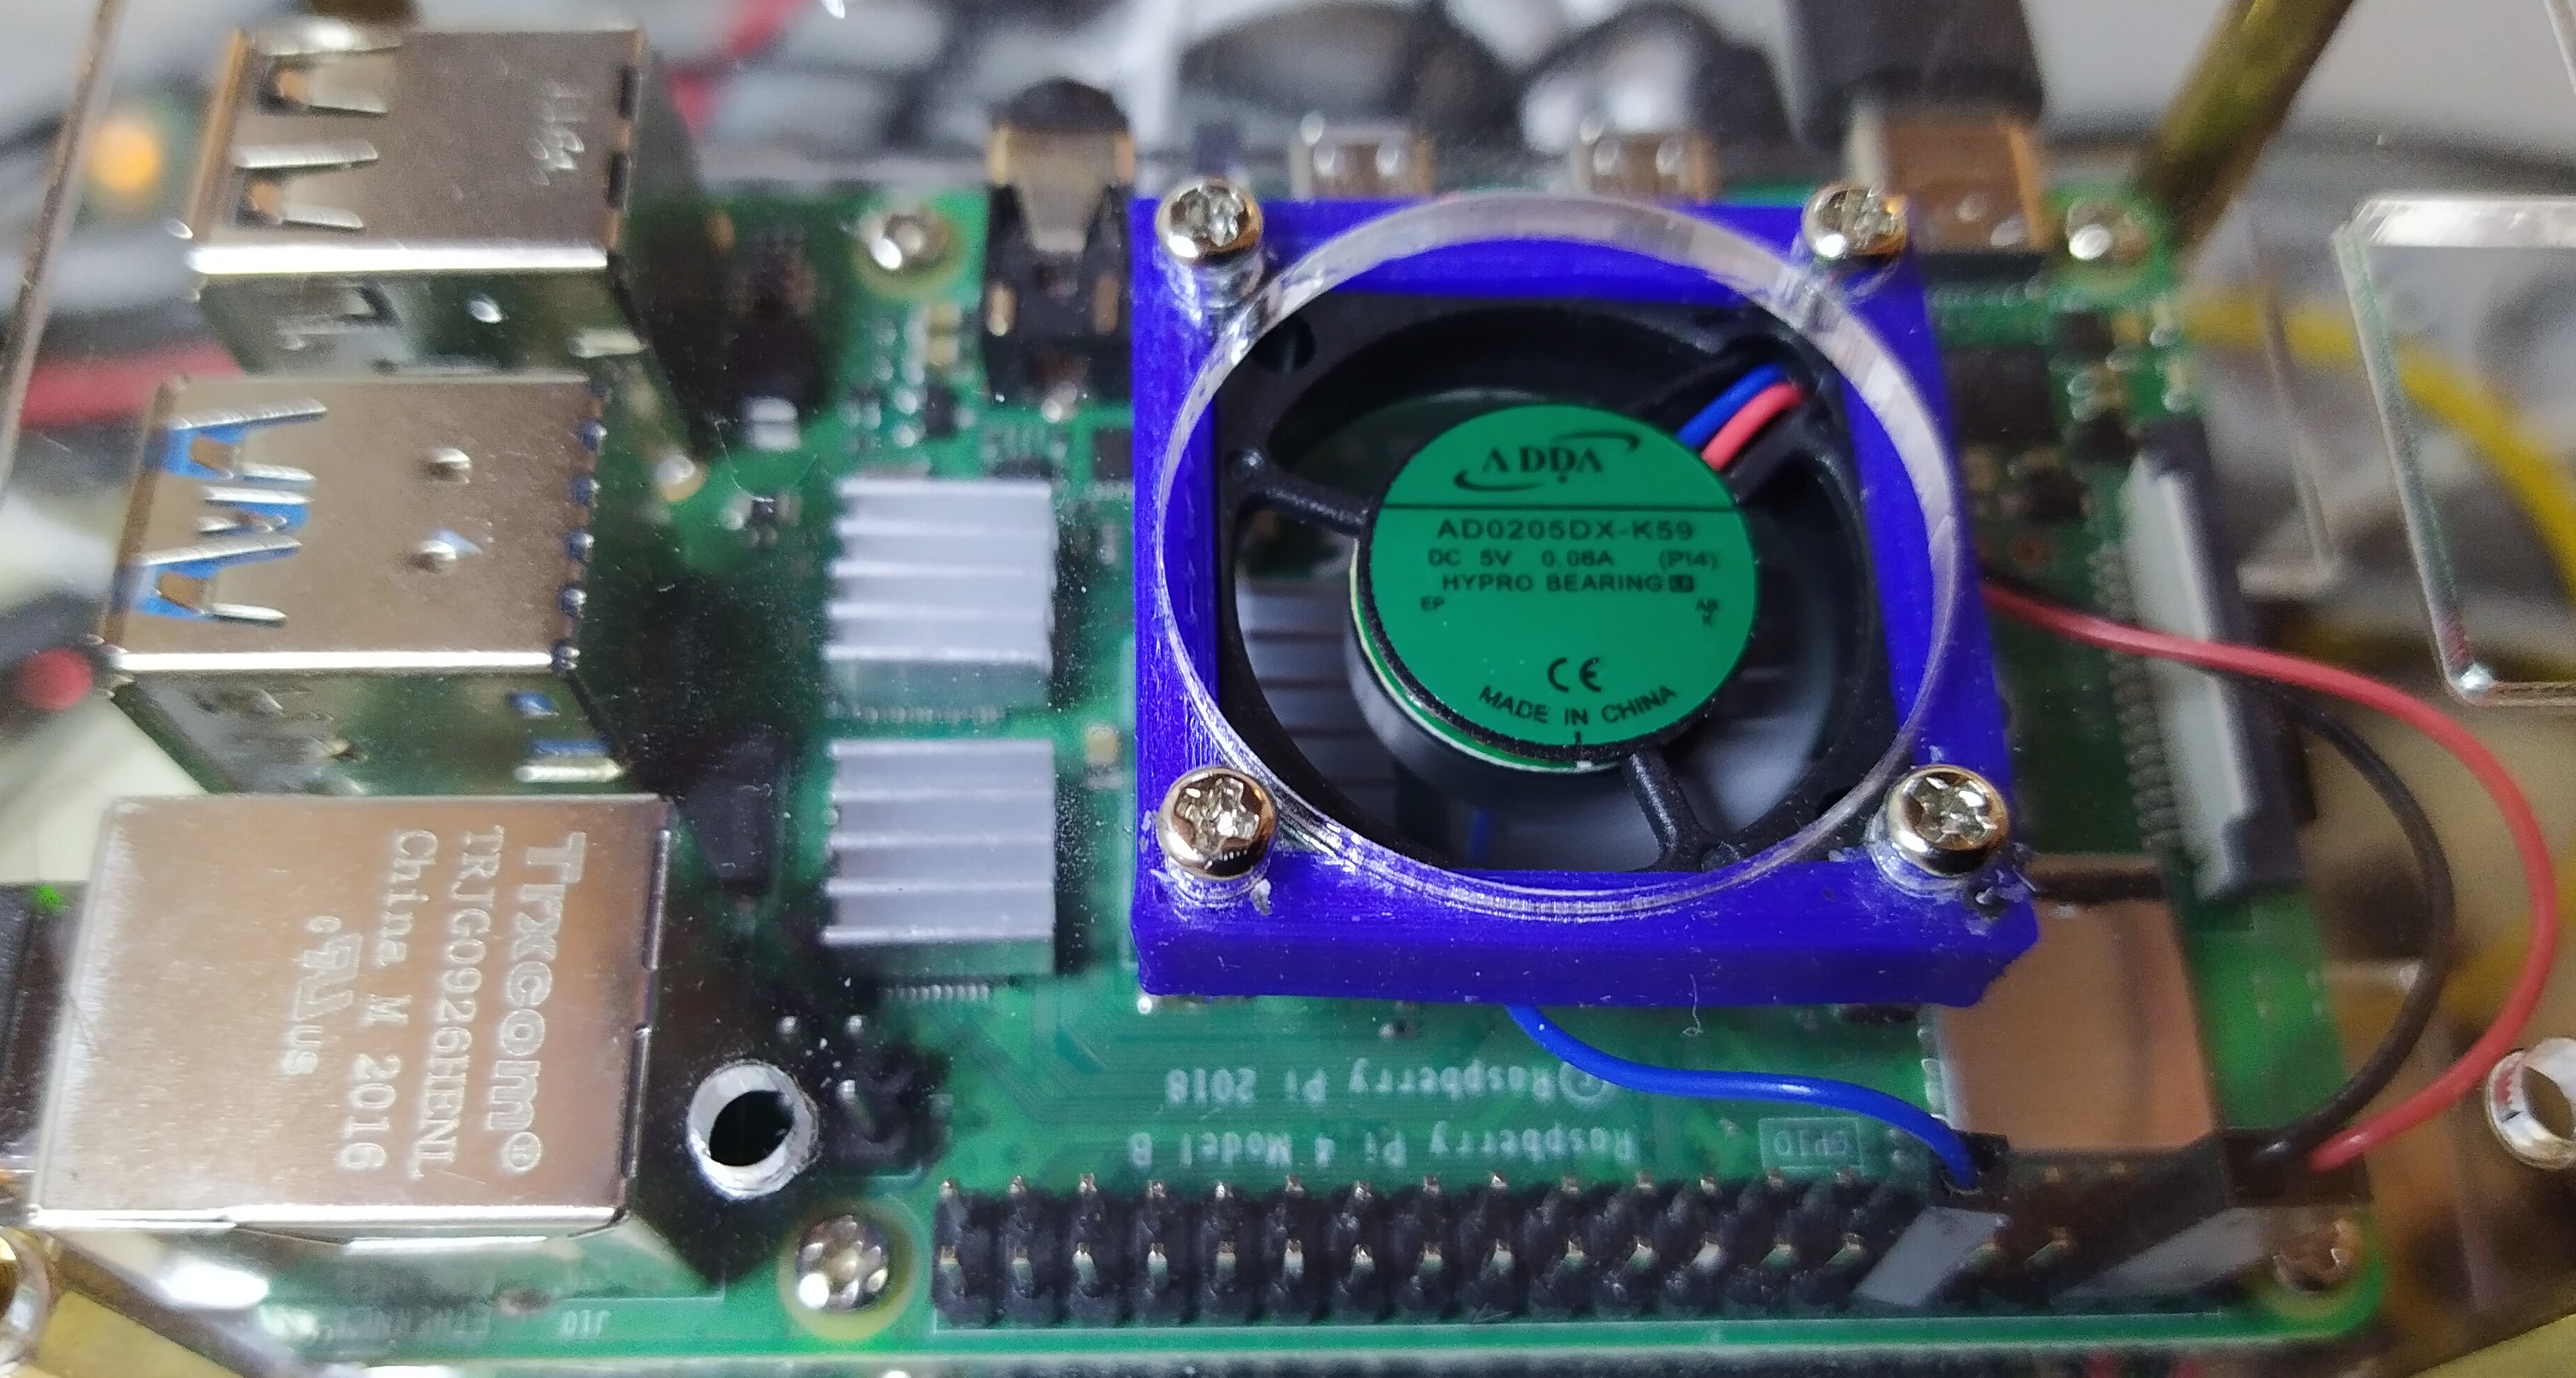
The official raspberry fan adda ad0205dx-k59 (30mm x 30mm) mounted in a 3d printed holder so it fits like a 40mx40m fan.


PWM uses the width of the pulses to control the average voltage. Small pulses reduces the duty-cycle. Width pulses increases the duty-cycle.
                  ----------        ----------
                  |        |        |        |
                  |        |        |        |
                  |        |        |        |
                  |        |        |        |
         ----------        ----------        ----------

                  <--------><------->
                     T on     T off

                  <----------------->
                          T
The duty-cycle can be calculated using:
    T on
   ---- x 100%
     T
The PWM (hardware controlled) signal can be generated on GPIO 12/13/18/19. However there are only two channels, so only two different PWM streams can be generated at a time. GPIO 12/18 are on one channel, GPIO 13/19 on the other. More info: https://www.raspberrypi.org/documentation/usage/gpio/
Note: Unlike Raspios, several Linux distros, like Fedora 32+, are already compiled without the legacy interface, so there’s no /sys/class/gpio on the system. Common gpio python modules like RPi.GPIO won't work anymore. This repo uses the new character device interface /dev/gpiochipN provided by the upstream kernel. This is the current way of interacting with GPIO.
The fan.py script in this repo was original created by https://github.com/DriftKingTW/Raspberry-Pi-PWM-Fan-Control, but it now uses a different python module, which are capable of using the new /dev/gpiochipN interface in the Linux kernel. It runs in a container, so it can run on any raspberry pi Linux distro with Podman or Docker.
Podman and Docker are interchangeable. Every where you see 'podman' or 'docker', you can use the other. They have exactly the same command line parameters. However, Podman is more save and does not need a daemon. Read here why you should use Podman over Docker.
Build a container image that includes:
- gpiod cli
- gpiod python module
- lgpio & rgpio python modules
- [fan.py]9https://github.com/tedsluis/raspberry-pi-pwm-fan-control/blob/main/fan.py), the python script that will control the fan speed (it only needs the lgpio python module).
# git clone https://github.com/tedsluis/raspberry-pi-pwm-fan-control.git
# cd raspberry-pi-pwm-fan-control
# sudo podman build --tag gpio .

# sudo podman images
REPOSITORY                         TAG     IMAGE ID      CREATED       SIZE
localhost/gpio                     latest  62f18d7517ca  6 hours ago   926 MB
# sudo podman run -it --rm --name gpioexperiment \
                           --device=/dev/gpiochip0 \
                           localhost/gpio \
                           /usr/bin/python3 /src/fan.py \
                           --verbose

MIN_TEMP: 40
MAX_TEMP: 60
FAN_LOW: 20
FAN_HIGH: 100
WAIT_TIME: 10
PWM_GPIO_NR: 18
PWM_FREQ: 10000
VERBOSE: 1
NODE_EXPORTER: 0

fan speed:  60     temp:  50.147
fan speed:  60     temp:  49.66
fan speed:  56     temp:  49.173
fan speed:  60     temp:  50.147
fan speed:  64     temp:  50.634
# sudo podman run -it --rm --name gpioexperiment --device=/dev/gpiochip0 localhost/gpio /bin/bash

[root@074737ba6639 /]# /src/fan.py --help

fan.py [--min-temp=40] [--max-temp=70] [--fan-low=20] [--fan-high=100] [--wait-time=1]
       [--pwm-gpio=18] [--pwm-freq=10000] [--node-exporter] [-v|--verbose] [-h|--help]
run container with fan.py and node-exporter metrics (text file collector) for prometheus as a daemon (non interactive):
# sudo mkdir /var/lib/node_exporter
# sudo podman run -d --rm --name raspberryfan \
                          -v /var/lib/node_exporter:/var/lib/node_exporter:z \
                          --device=/dev/gpiochip0 \
                          localhost/gpio \
                          /usr/bin/python3 /src/fan.py \
                          --node-exporter
note: be sure you have node exporter installed. Metrics will be written in /var/lib/node_exporter
note: remove the node-exporter lines from 'raspberryfan.service' if not needed.
# sudo cp raspberryfan.service /etc/systemd/system/raspberryfan.service
# sudo mkdir /var/lib/node-exporter
# sudo systemctl enable raspberryfan.service
# sudo systemctl start raspberryfan.service
# sudo systemctl status raspberryfan.service
view node-exporter metrics:
# sudo tail -f /var/lib/node_exporter/fan-metrics.prom
When the --node-exporter parameter is used, the fan.py script writes the following metrics every interval in /var/lib/node_exporter/fan-metrics.prom:
# sudo tail -f  /var/lib/node_exporter/fan-metrics.prom
raspberry_fan_speed  68.0
raspberry_fan_temp  52.095
raspberry_fan_min_temp  40
raspberry_fan_max_temp  60
raspberry_fan_fan_low  20
raspberry_fan_fan_high  100
raspberry_fan_wait_time  10
raspberry_fan_pwm_gpio  18
raspberry_fan_freq  10000
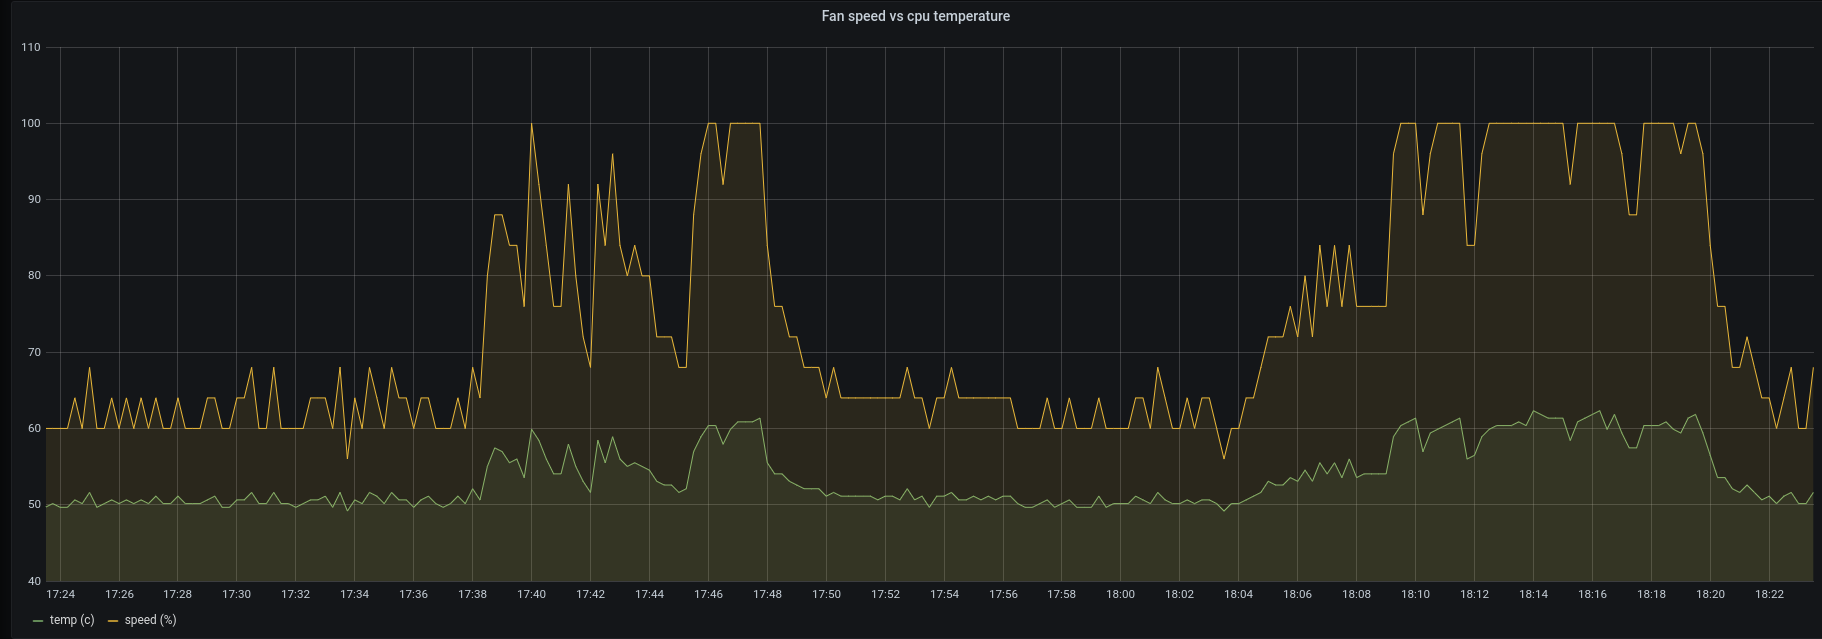
This file is picked up bij node-exporter textfile collector and send to prometheus. Using Grafana I created this graph:
 The fan speed follows the cpu temperature. The fan keeps the cpu below 65 celcius, while it was under full load.
I came across the lgpio python module and I found exactly what I needed to control the raspberry fan: tx_pwm
-
lgpio allows control of a local Pi's GPIO, i.e. it is like RPi.GPIO and RPIO.GPIO. It is auto-generated from a C library using SWIG.
-
rgpio allows control of local and remote Pi's GPIO, i.e. it is like pigpio. Like pigpio it also uses a client server module.
import lgpio
This module was very usefull to control the raspberry fan:
tx_pwm(handle, gpio, pwm_frequency, pwm_duty_cycle, pulse_offset=0, pulse_cycles=0)
This starts software timed PWM on an output GPIO.

Parameters

         handle:= >= 0 (as returned by gpiochip_open).
           gpio:= the GPIO to be pulsed.
  pwm_frequency:= PWM frequency in Hz (0=off, 0.1-10000).
 pwm_duty_cycle:= PWM duty cycle in % (0-100).
  pulse_offset:= offset from nominal pulse start position.
  pulse_cycles:= the number of cycles to be sent, 0 for infinite.


If OK returns the number of entries left in the PWM queue for the GPIO.

On failure returns a negative error code.

Each successful call to this function consumes one PWM queue entry.

pulse_cycles cycles are transmitted (0 means infinite).

PWM is characterised by two values, its frequency (number of cycles per second) and its dutycycle (percentage of high time per cycle).

pulse_offset is a microsecond offset from the natural start of the pulse cycle.

For instance if the PWM frequency is 10 Hz the natural start of each cycle is at seconds 0, then 0.1, 0.2, 0.3 etc. In this case if the offset is 20000 microseconds the cycle will start at seconds 0.02, 0.12, 0.22, 0.32 etc.

Another PWM command may be issued to the GPIO before the last has finished.

If the last pulse had infinite cycles then it will be replaced by the new settings at the end of the current cycle. Otherwise it will be replaced by the new settings when all its cycles are complete.

Multiple pulse settings may be queued in this way.
Not needed for the fan.py script, nevertheless intresting to experiment with, since it supports the new character device interface /dev/gpiochipN in the linux kernel. It is part of the linux kernel, but it does not support PWM.
- https://git.kernel.org/pub/scm/libs/libgpiod/libgpiod.git/tree/README
- https://fedoramagazine.org/turnon-led-fedora-iot/
* gpiodetect - list all gpiochips present on the system, their names, labels
               and number of GPIO lines

* gpioinfo   - list all lines of specified gpiochips, their names, consumers,
               direction, active state and additional flags

* gpioget    - read values of specified GPIO lines

* gpioset    - set values of specified GPIO lines, potentially keep the lines
               exported and wait until timeout, user input or signal

* gpiofind   - find the gpiochip name and line offset given the line name

* gpiomon    - wait for events on GPIO lines, specify which events to watch,
               how many events to process before exiting or if the events
               should be reported to the console
import gpiod