-
Notifications
You must be signed in to change notification settings - Fork 2
Crowdsourcing Annotations
For collecting the annotations from human crowd workers, you typically need to:
- prepare user-friendly web interface for collecting the annotations,
- monitor the progress of the crowdworkers.
Factgenie supports both of these!

Currently, factgenie supports local annotators and Prolific.com. We plan to support other crowdsourcing services in the future.
Caution
You should password-protect the application when you are running a human evaluation campaign so that annotators cannot access other pages. See the Setup guide for more information.
You can set up a new crowsourcing campaign through the web interface:
- Go to
/crowdsourcingand click on New campaign. - Insert a unique campaign ID .
- Configure the crowdsourcing campaign.
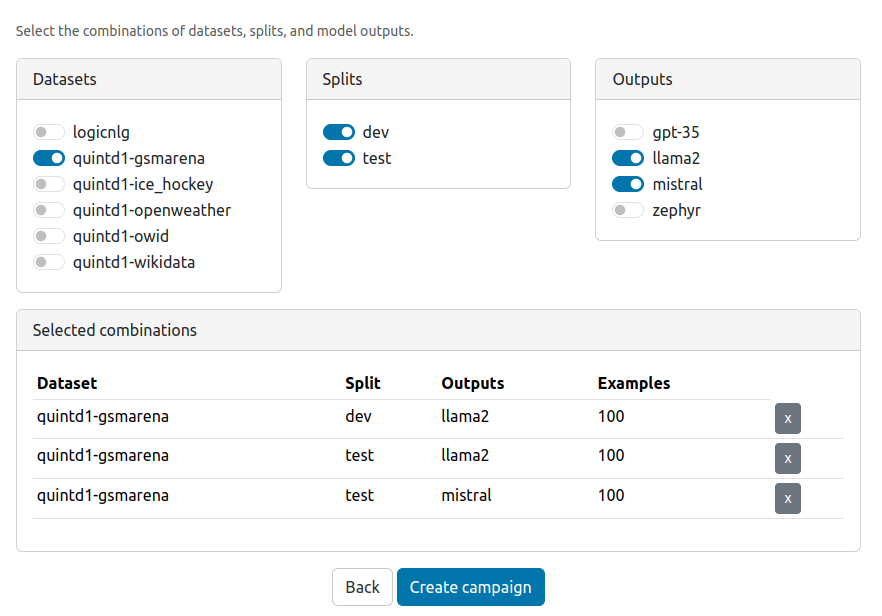
- Select the datasets and splits you want to annotate.
Let us now look into the steps 3 and 4 in more details.
The fields you can configure are the following:
-
Annotation categories: Names, colors, and descriptions of the categories you want to annotate.
- The colors will be later used for the highlights in the web interface.
-
Annotator instructions: The instructions that will be shown to the annotators. You can use Markdown syntax here.
- You can use the ✨ Pre-fill prompt template button to insert basic instruction template with your custom error categories into the textbox.
- You can then modify the instructions in the textbox.
- You can also modify the template itself in
factgenie/config/default_prompts.yml.
-
Final message: The message shown after the annotator has submitted the annotations.
- If you are using a crowdsourcing plaform, you should include the completion code. Here you can find a detailed guide for Prolific.
- You can use Markdown syntax.
- Service: Which crowdsourcing service will be used for the campaign. You can also select "Local annotators only".
- Examples per batch: The number of examples each annotator will see.
-
Annotators per example: Maximum number of annotators that can annotate an example.
- Factgenie will always try to collect annotations from at least N annotators for each example before assigning an example to the (N+1)-th annotator.
- Annotation granularity: The smallest unit annotators can annotate (words / characters).
-
Shuffle outputs: How to shuffle outputs before batching:
-
Shuffle all- Each annotator will see a random subset of model outputs in the campaign.
-
Sort by example id, shuffle model outputs- Model outputs for a specific example will be grouped together and shuffled.
- 💡 If you also set batch size to the number of unique model outputs for each example, each annotator will see an exactly one shuffled set of model outputs for a specific example.
-
Sort by example id, keep the order of model outputs: sort examples by the example index, keep the order of model outputs.- Model outputs for a specific example will be grouped together (no shuffling).
- Similar to the previous option, only the model outputs will not be shuffled. This is not recommended for blind system ranking, as the annotators will be able to distinguish the model by their order.
-
Keep the default order: Keep all examples and setups in the default order.- Each annotator will see (a subset of) the outputs of a single model in the increasing number of example index.
-
- Idle time (minutes): The time after which an unfinished example can be re-assigned to a new annotator.
-
Example-level inputs
- Additional information that you can collect from the annotators for each example.
- Flags: True / false statements. Each statement will be displayed alongside a checkbox.
- List of options: A list of comma-delimited options. Each list will be displayed as a slider or a select box.
- Text fields: Free-form text inputs. The label will be displayed above the textbox.
In the next step, you can select the datasets and splits you want to annotate.
Note that for make the selection process easier, we use a cartesian product of the selected datasets, splits, and model outputs (existing combinations only).
You can check the selected combinations in the box below.

After the campaign is created, the selected examples will be listed in factgenie/campaigns/<campaign-id>/db.csv. You can edit this file before starting the campaign if you wish to customize the data selection further.
The created campaign will appear in the list of campaigs:

You can now preview the annotation page by clicking on the 👁️🗨️ icon. If a crowdworker opens this page, the corresponding batch of examples will be assigned to them.
Submit the annotations from the Preview page (and delete the resulting files) to ensure that everything works from your point of view.
💡 The Preview page does not mark the previewed batch as assigned, allowing you to preview the annotator page freely. However, it marks the batch as finished if you submit the annotations.
To customize the annotation page, go to factgenie/campaigns/<your_campaign_id>/pages and modify the annotate.html file.
Make sure that everything works as intended using the Preview feature.
For running the campaign, you need to run the server with a public URL so that it is accessible to the crowdworkers.
You may need to set the host_prefix to make factgenie work behind a reverse proxy. See the section Configuration file on the Setup page for more information.
Once factgenie is running, you can get the link for the crowdsourcing page in the campaign detail page:

Use this URL when setting up the campaign on the crowdsourcing service.
On the campaign detail page, you can also monitor how individual batches get assigned and completed.
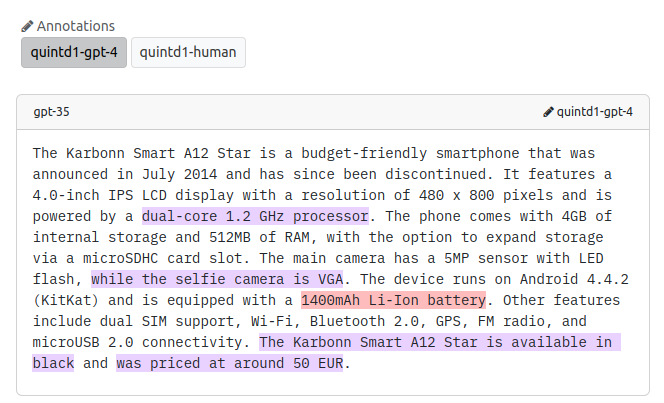
You can immediately view the collected annotations on the /browse page. The annotations from each campaign can be selected using toggle buttons above model outputs.
